At the very beginning the following two system groups are automatically available on your platform:
| Universe |
Everyone! That is to say users who are logged in and users who are not logged in. (It is not possible to assign users to this group. Therefore, you do not see it in the group overview of the p-admin interface.) |
| Platform Main Group |
Each user who registers on your platform is automatically added to this group. The name of your platform is automatically assigned to the group name (e.g. "my platform main group"). The name can be adapted by the p-admin. |
(1) In addition to the system groups, you can add individual groups. In order to do so, the following steps need to be completed:
(a) In the Platform Administration Interface click on "Groups Management"
(b) Click on the link 
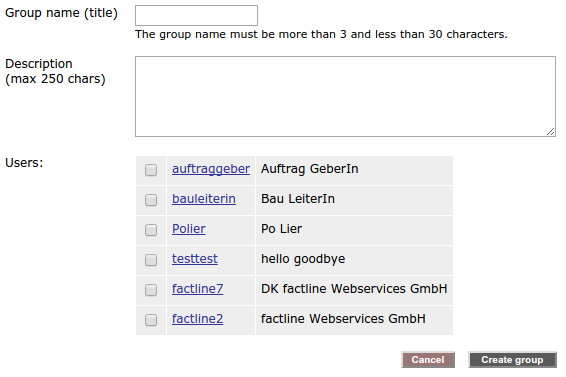
(c) You will get an input form, where you have to fill the "Group name (title)" and some optional information about the group and the users:

(d) When ready, click on "Create group"
(2) In addition to the already available groups on the platform, you can create sub-groups. In order to complete the action, please, proceed as follows:
(a) In the Platform Administration Interface click on "Groups Management"
(b) In the list of the all available grups on this platform you will see a link  - click on it. - click on it.
(c) You will get the same input form as the one for creation of groups - (1)(c). Please, fill the required information.
(d) Click on "Create group"
(3) There are four actions available for the existing groups:

(a) Edit group
- click on the "edit" button placed next to the name of the group
- modify name and description of the group
- click on "edit group" on order to save the changes
(b) Users options
- click on the "users" button placed next to the name of the group
- add user by performing a search
- get a list of the users
- remove a user by clicking on the red icon
(c) Hide group
- click on the "hide" button placed next to the name of the group
- in order to un-hide a gorup go to the In-Platform Administration Interface > "Groups Management" and in section "Hidden groups on this platform" click on the link "un-hide" next to the desired group
(d) Move group
- click on the "move" button placed next to the name of the group
- now the same icons of the other groups become available
- move the selected group above another group by clicking on the active button
|

